Wednesday, June 8, 2011
Organizing Kitchen/House
To start this post off, I must say, my house is messy. And no, I'm not one of those I'm-gonna-say-my-house-is-messy-even-though-it's-completely-not people. My house is truly a disorganized mess. I can barely stand to live here. So, I've decided that on top of my cooking experiments, I'm going to start a house organizing project. Just slowly adding onto my to-do list.
Friday, May 20, 2011
#3 雪耳木瓜糖水{Snow Ears Papaya Dessert}

My revised Snow Ears papaya dessert recipe, in addition to the papaya and the rock candy, contains snow ears, eggs, and ginger. 雪耳, which translates into snow ears, is a type of yellow fungus that provides a good assortment of health benefits, according to a very reliable source, my mom. It's texture is kind of chewy and sponge-y and crunchy. It may sound kind of strange, but it is pretty yummy and how can you say no to something that is good for you, right?
雪耳木瓜糖水
Ingredients (6-8 servings)
- 1 papaya (you would need a large Mexican papaya or 2-3 Hawaiian ones)
- 1 bag rock sugar
- 2 eggs, whisked
- 1 slice of ginger
- 3-4 pieces of dried snow ears
- water
Steps
1) Soak the dried snow ears in warm water for 1 to 2 hours before cooking with the papaya. After you're done soaking them, split the snow ears into small pieces with your hands. Each piece should be about the size of a quarter. You could really do whatever you want, but I find that larger pieces of snow ears can be pretty annoying.
2) Peel papaya and cut into small squares.
3) Place the papaya and the snow ears into the pot and add enough water so that everything is covered.
4) Heat the stove at high until the water is boiling.
5) Add the sugar and the ginger when the water is boiling. Then, turn down to low-medium heat.
6) Heat for about 15-20 minutes and add the whisked eggs. Turn off the heat after the eggs are added. This is very important in order to make sure that the eggs aren't overcooked.
7) Serve warm or let cool for 1-2 hours before refrigerating and then serving cold. Make sure to leave the lid slightly open when cooling.
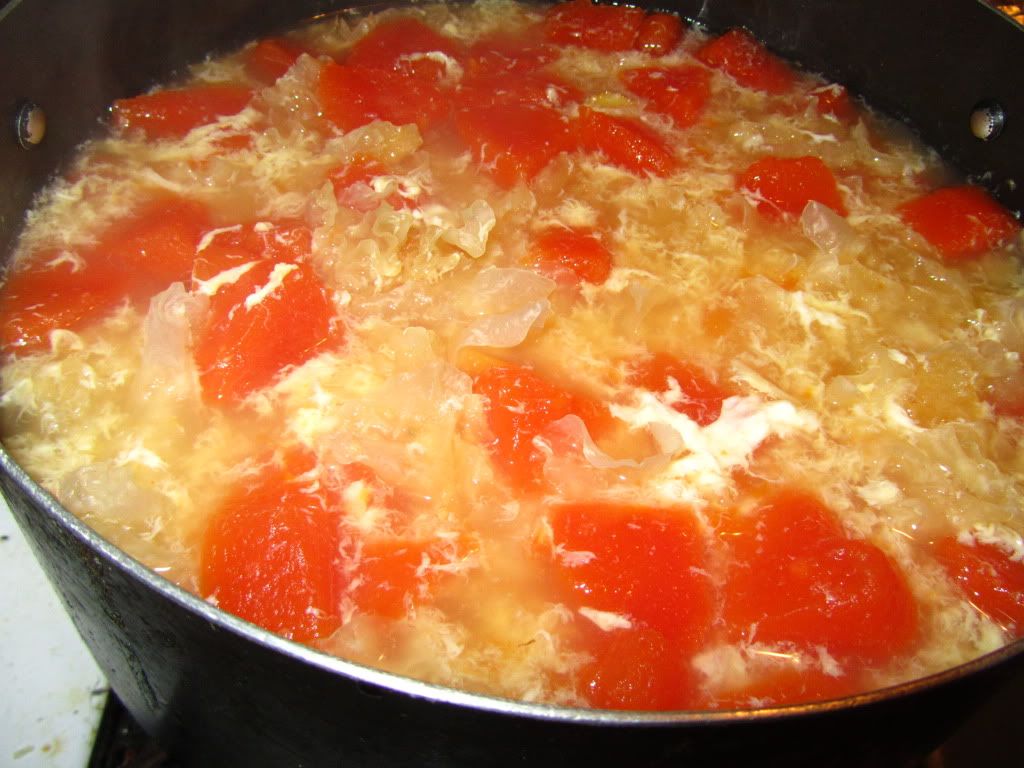
One of my failure this time was that I added too much snow ears. I put in about a fifth of the bag of dried snow ear and it expanded to fill almost half the pot. They were quite deceiving when they were dried. Also, I left the pieces too big and ended up chewing and chewing and chewing the snow ears most of the time while the papaya was painfully neglected. Of course, I'm still extremely happy with how the dessert turned out. The ginger was definitely a nice add and worked well with the dessert. Definitely matched what I remembered from my childhood. I will definitely make this is recipe and hopefully, it will be absolutely perfect! Third time's the charm, right? Happy chewing!

<3 Joanna Mei
Pan-frying Frozen Pot Stickers
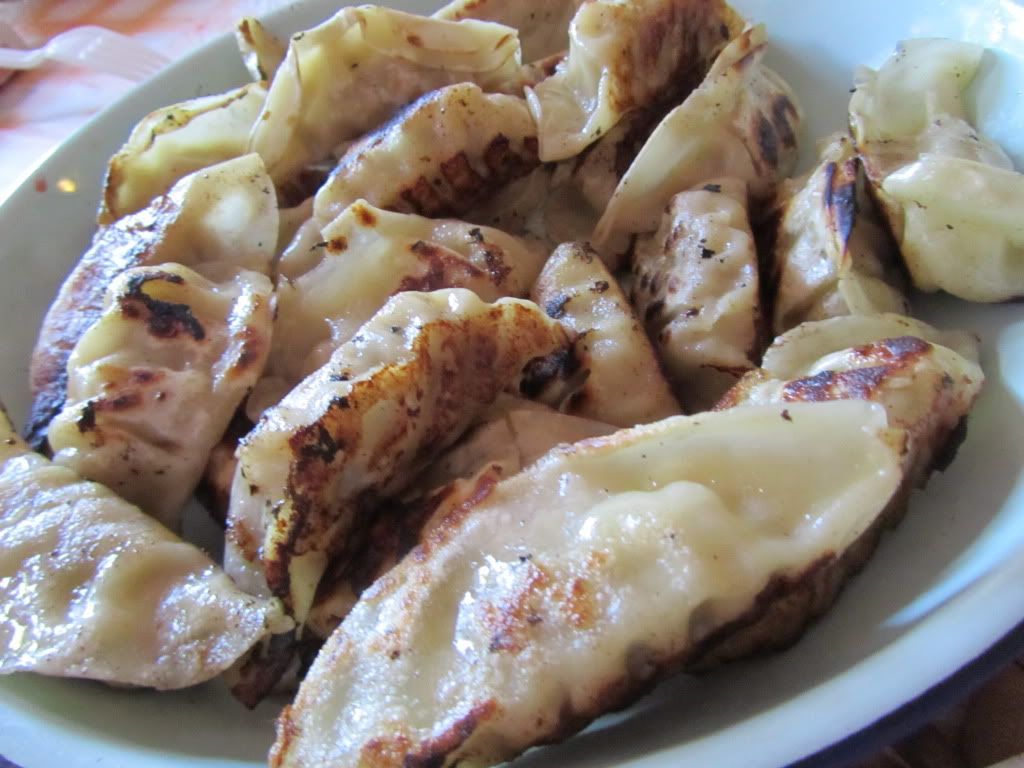
How to Pan Fry Frozen Pot Stickers
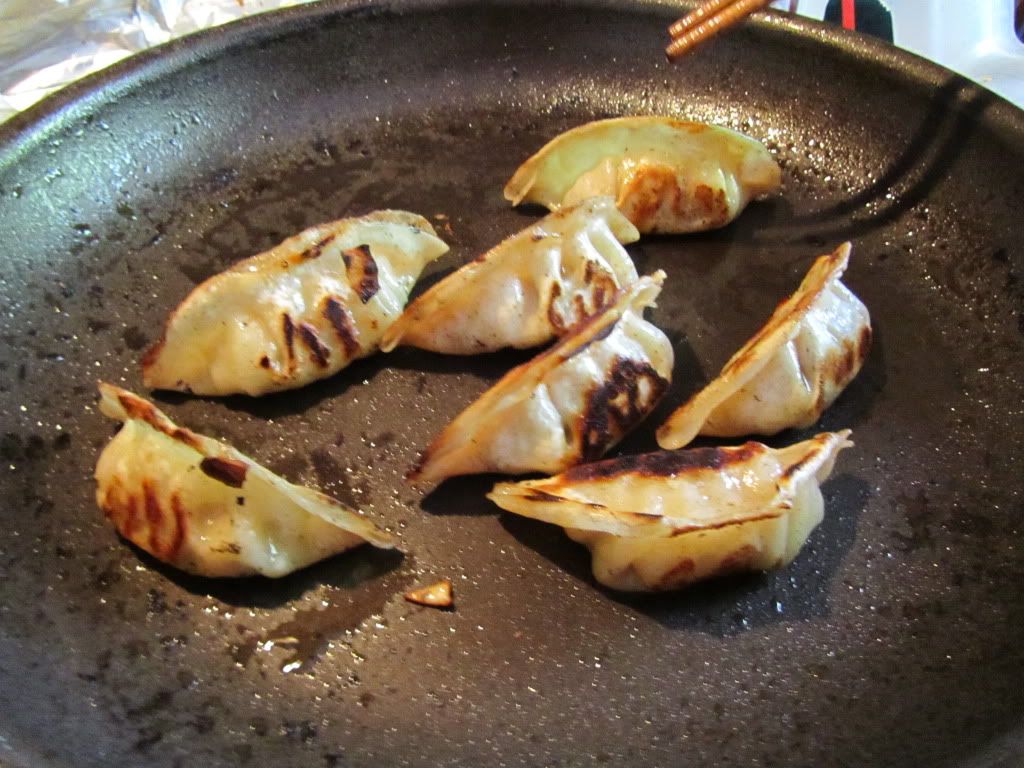 |
| burning... :( |
- Heat the pan at high and pour a generous amount of oil in the pan.
- Place the pot sticker in the pans. I put them all in with their bottoms down to make everything unanimous.
- OPTIONAL: If the pot stickers are still too frozen/not thawed, pour some hot water in the pan and put the lid on. Wait until the water is gone before you finish pan frying the pot stickers.
- Add a little bit of oil. Put the stove on low-medium heat and fry until the pot stickers are nice and crispy. I tried to fry each side, but my mom said that this wasn't necessary. One side is fine.
- Serve w/ sauce. I use a combination of red vinegar, soy sauce and garlic chili pepper sauce.
Now, onto my mistakes...
- I kept on forgetting to turn down the fire when I was pan frying. Note: If left on the high heat, they will burn VERY quickly.
- I didn't wipe the pan after the first batch was burned, so the subsequent batches all had little black burnt remains on them.
- I didn't add oil after the water was gone. This was also a small factor in the burning.
Hopefully, the next time I pan-fry pot stickers, they will turn out beautifully. I love pot stickers and it's so hard to resist the variety of pot stickers at the Asian supermarkets. They're really cheap and can last a couple of meals, so I may just stock up on some when school starts up again. Of course, I may just look for an actually pot sticker recipe, but before that, I will stick to the frozen sort. Either way, I love pot stickers and totally recommend them to everyone. Happy frying!
<3 Joanna Mei
Tuesday, May 17, 2011
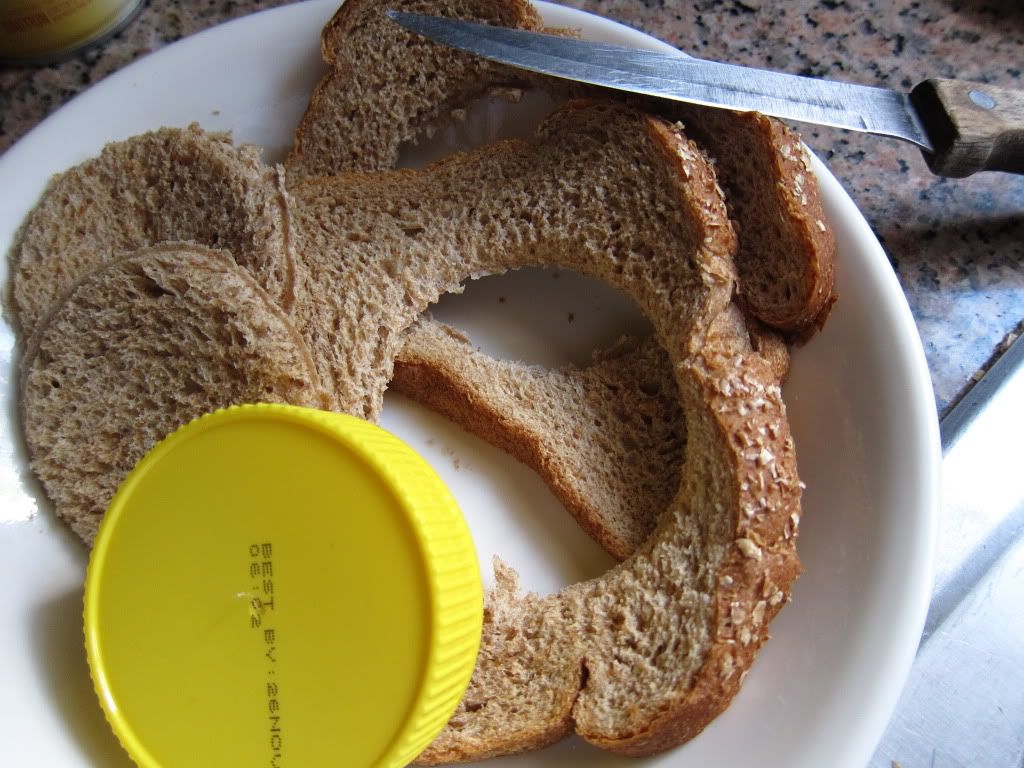
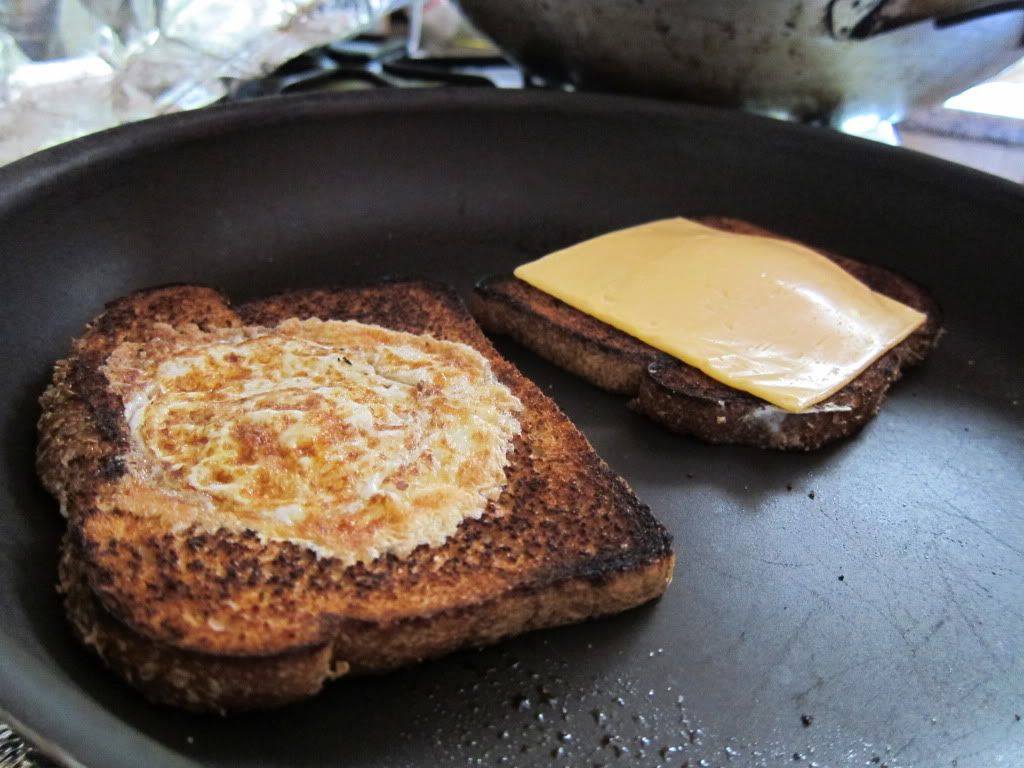
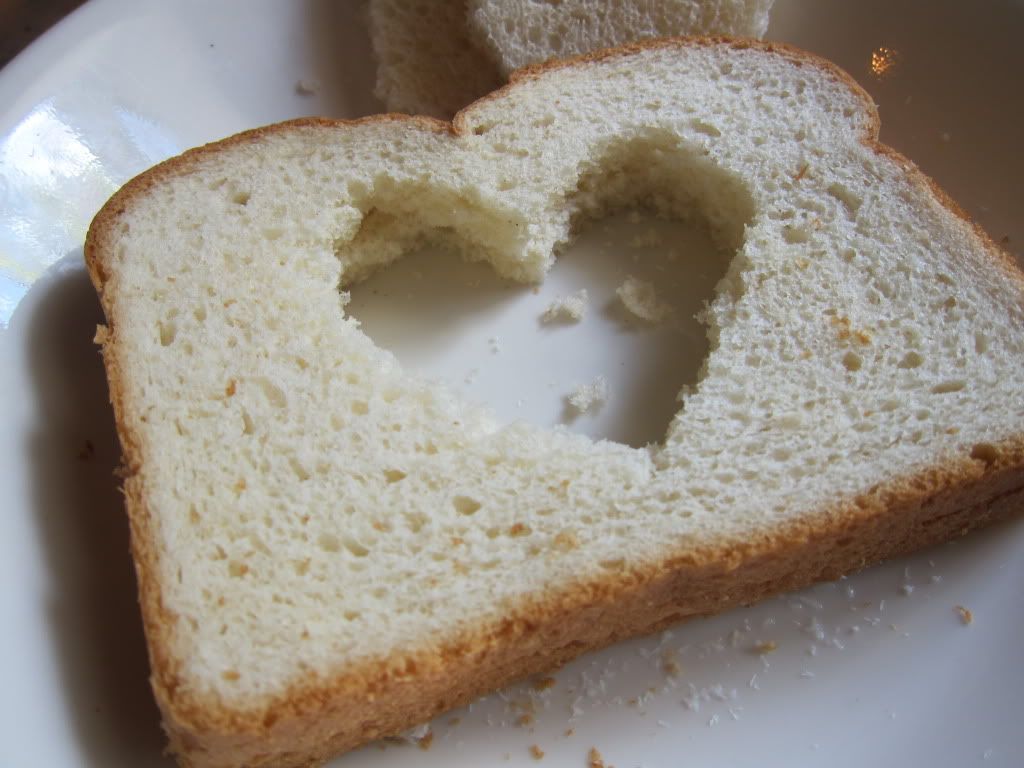
#2 Grilled Cheese Egg-in-Hole
 |
| a work of art. |
I love eggs. I mean, I seriously love eggs. I even go so far as to say that it's my favorite food. So, seeing an egg embedded in a piece of toast with a lovely piece of cheese wedged in between was like seeing heaven come on earth. Such a yummy piece of goodness should've been taken away during the rapture. ;)
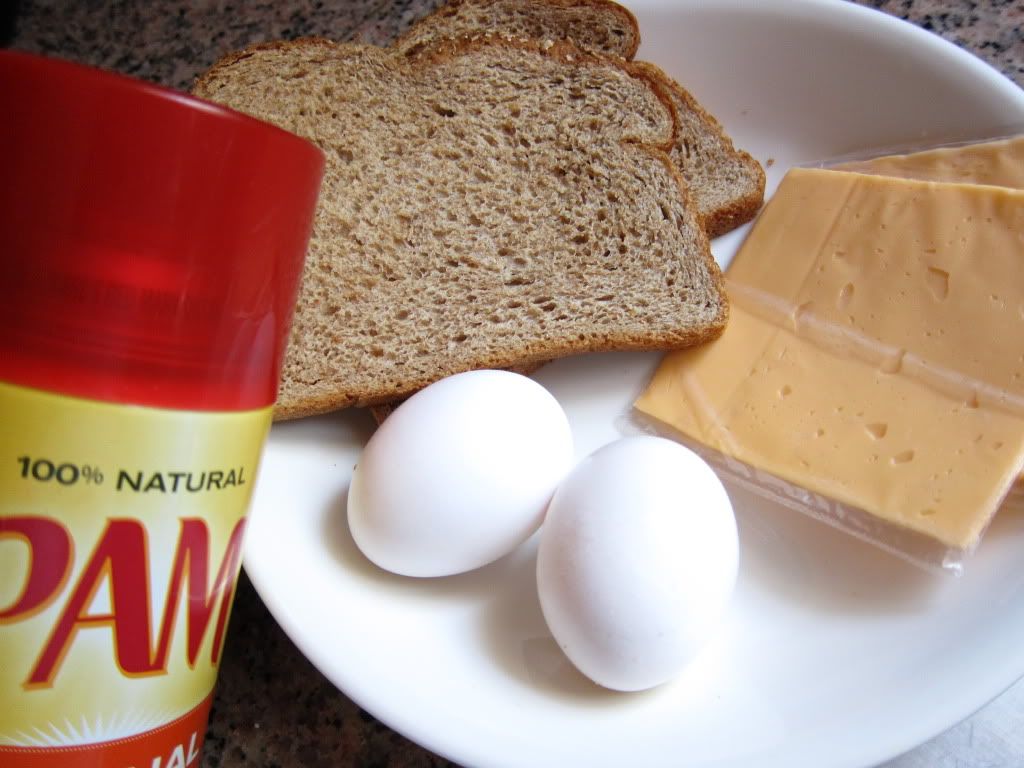
Grilled Cheese Egg-in-Hole
Ingredients (1 serving)
- 2 slices of bread
- 2 eggs
- 1 or 2 slices of cheese (I used 2 slices of American cheese, but choose whatever you want!)
- Pam (the recipe called for butter but I didn't have any butter)
- a pinch of salt
1) Cut holes out of the bread. I used the lid of a peanut butter jar to get the perfect circles, but my sister cut out hearts with a knife and they were so cute! <3
3) Place the bread on the pan and toast until slightly brown.
4) Flip the bread and crack your eggs into the hole.
5) Change to medium heat and add the salt.
6) Flip the bread and fry the other side. Place the slice of cheese on top of one slice of bread. Once the other slice is cooked, place that slice on top of the cheese.
 |
| slightly burnt :( |
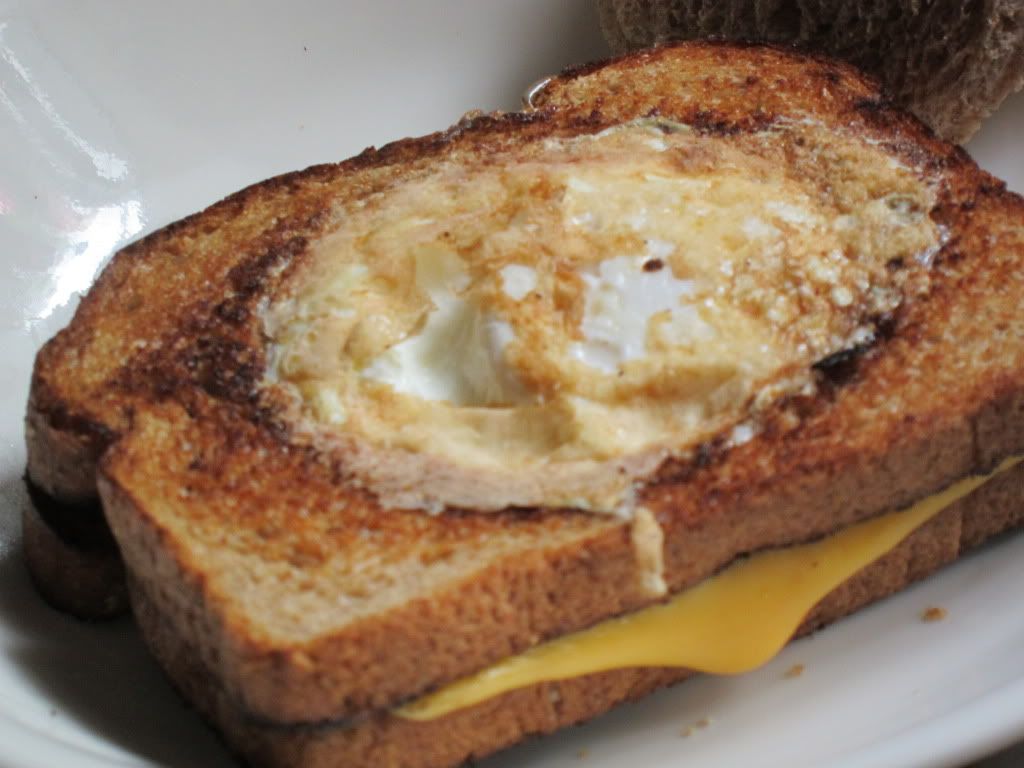 |
| the finished product <333 |

<3 Joanna Mei
credit: Serious Eats
 |
| Much love <333 |
Friday, May 13, 2011
#1 - 木瓜糖水 {Papaya Dessert}
For several weeks, I've been considering starting a blog about my ventures into cooking. I thought that it would be interesting to document how well things turn out for a young female with little to no experience with cooking. I think that knowing how to cook is a beautiful thing. Not only is cooking fun, it will also give you a better appreciation for the things you eat. The amount of work that goes into a dish never ceases to amaze me and now, I will get to experience the joy of producing of good meal. Now, onward to my first dish!
In Chinese, this dish is called 木瓜糖水, which translates into Papaya Sweetened Water. This is definitely one of my favorite desserts and most importantly, it will always remind me of my childhood (which is not so far away, but still!) As soon as I thought of this blog idea, I went to my mom and asked her to teach me how to make my awesome dessert and it turned out to be quite simple.
木瓜糖水
Ingredients (3 servings)
- 1/2 papaya
- 1/3 bag of 冰糖 (rock sugar) (can substitute with sugar)
- water (can substitute with milk)
1) Cut papaya into small cubes
 2) Place cubes in pot and fill the pot with water. My mom just told me to estimate the amount of water depending on how many people being served. This answer, I found, was incredibly vague. I just added until the water covered the papaya and they started floating.
3) Heat the water at high heat until boil. [7-10 min]
4) Add the sugar and change to low heat. [10-15 min]
5) Serve hot or cold. If you want to serve it cold, make sure to let it cool for 1-2 hours with the lid partially on and then refrigerate it. I prefer to have it cold, but go with whatever you like.
I will definitely make this dish again with more ingredients like eggs, ginger, and 雪耳, a yellow fungus. This was definitely a simplified, no-frills version of the recipe, but I had to work with the ingredients I had with me in my dorm. I made it on the night before I moved out of my dorms, so I really had nothing left, except for what I had bought on an earlier shopping trip. I'm still really happy with how it turned out. I think that this is truly the best way to eat papaya, other than by itself. Papayas will always be one of my favorite fruits. <3 So, this is the end of my first post! Happy eating!
<3 Joanna Mei
In Chinese, this dish is called 木瓜糖水, which translates into Papaya Sweetened Water. This is definitely one of my favorite desserts and most importantly, it will always remind me of my childhood (which is not so far away, but still!) As soon as I thought of this blog idea, I went to my mom and asked her to teach me how to make my awesome dessert and it turned out to be quite simple.
木瓜糖水
Ingredients (3 servings)
- 1/2 papaya
- 1/3 bag of 冰糖 (rock sugar) (can substitute with sugar)
- water (can substitute with milk)
 |
| This is the rock sugar I used. Can be purchase in most Chinese supermarkets. |
1) Cut papaya into small cubes
3) Heat the water at high heat until boil. [7-10 min]
4) Add the sugar and change to low heat. [10-15 min]
5) Serve hot or cold. If you want to serve it cold, make sure to let it cool for 1-2 hours with the lid partially on and then refrigerate it. I prefer to have it cold, but go with whatever you like.
 |
| The finished dish! So yummy! ^_^ |
I will definitely make this dish again with more ingredients like eggs, ginger, and 雪耳, a yellow fungus. This was definitely a simplified, no-frills version of the recipe, but I had to work with the ingredients I had with me in my dorm. I made it on the night before I moved out of my dorms, so I really had nothing left, except for what I had bought on an earlier shopping trip. I'm still really happy with how it turned out. I think that this is truly the best way to eat papaya, other than by itself. Papayas will always be one of my favorite fruits. <3 So, this is the end of my first post! Happy eating!
<3 Joanna Mei
 |
| Watched Gossip Girl as I was cutting my papaya. >.< |
Subscribe to:
Posts (Atom)